Mitral TEER (transcatheter edge-to-edge repair): a Cath Lab 101 guide
Reviewed by Rodnie Oro, cath lab charge nurse · Last reviewed: October 2026 · Education only, not medical advice
Mitral TEER in one minute
What it is: the mitral valve sits between the left atrium and left ventricle. When it leaks (mitral regurgitation, MR), blood flows backwards with every beat. TEER is a keyhole procedure that clips the two valve leaflets together at the leak, passed up a vein from the groin, so no open-heart surgery is needed.
Who it is for: adults with significant MR and symptoms, for whom a heart team judges surgery too high risk or not the best option.
Main risks: bleeding at the groin, a small hole left in the wall between the atria, the clip coming loose from a leaflet, and rarely damage to the valve or heart. Your team will explain your own risk.
Usually: under general anaesthetic with transoesophageal echo (TOE), about 1 to 3 hours, often home after 1 to 2 nights.
On this page: What is mitral TEER? · Who is it for? · When is it done? · Step by step · Recovery · Risks · Kit list · First time in the lab? · FAQ
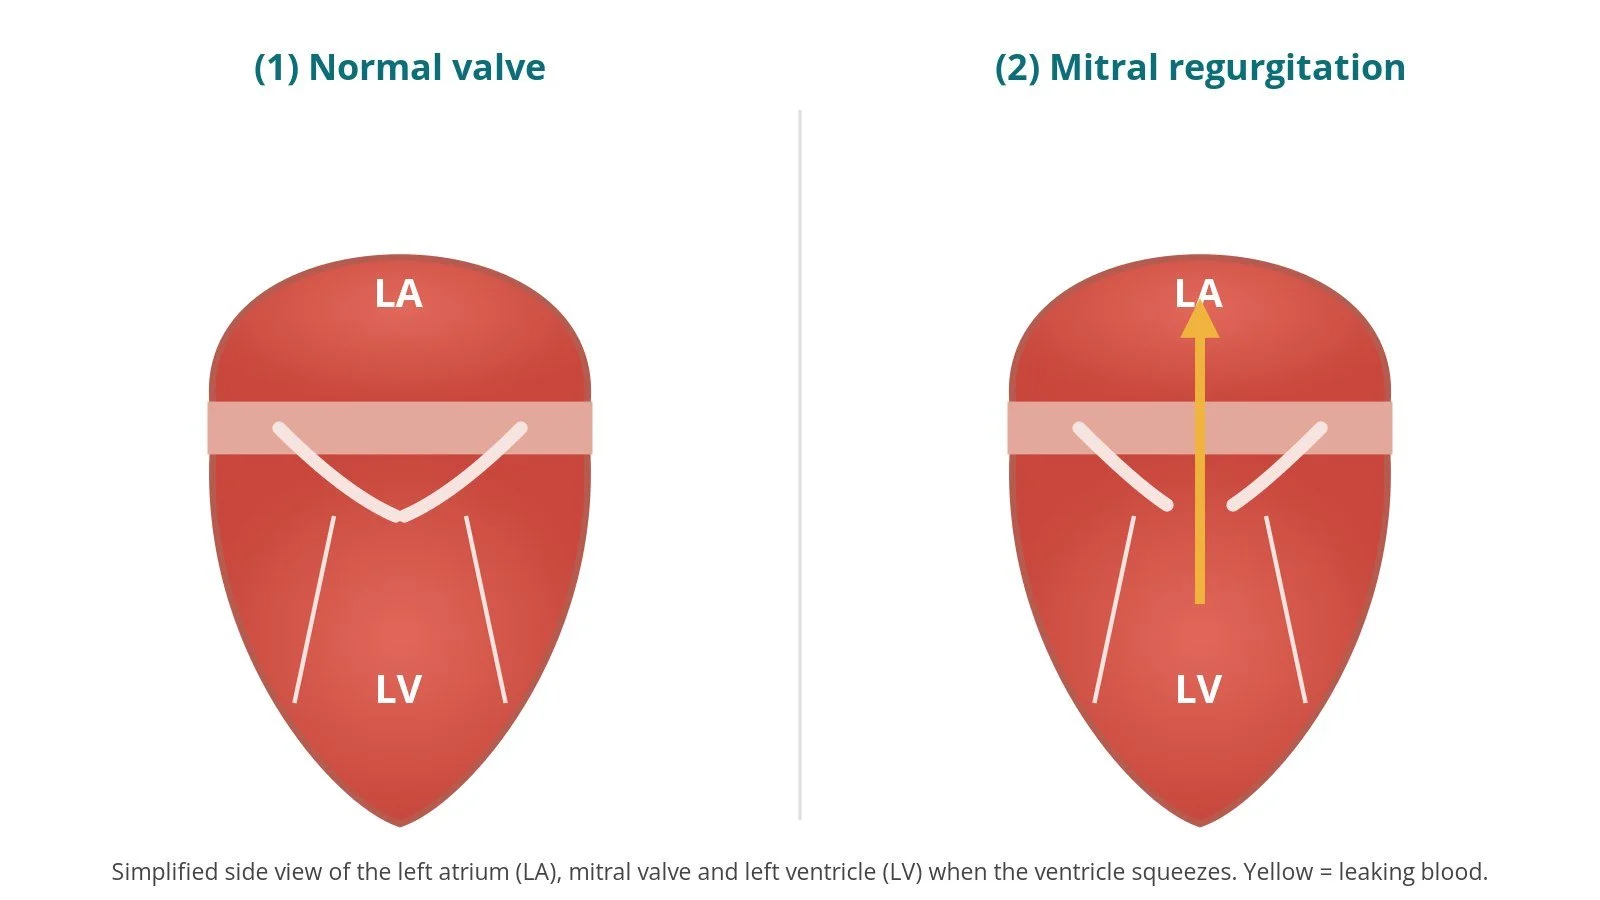
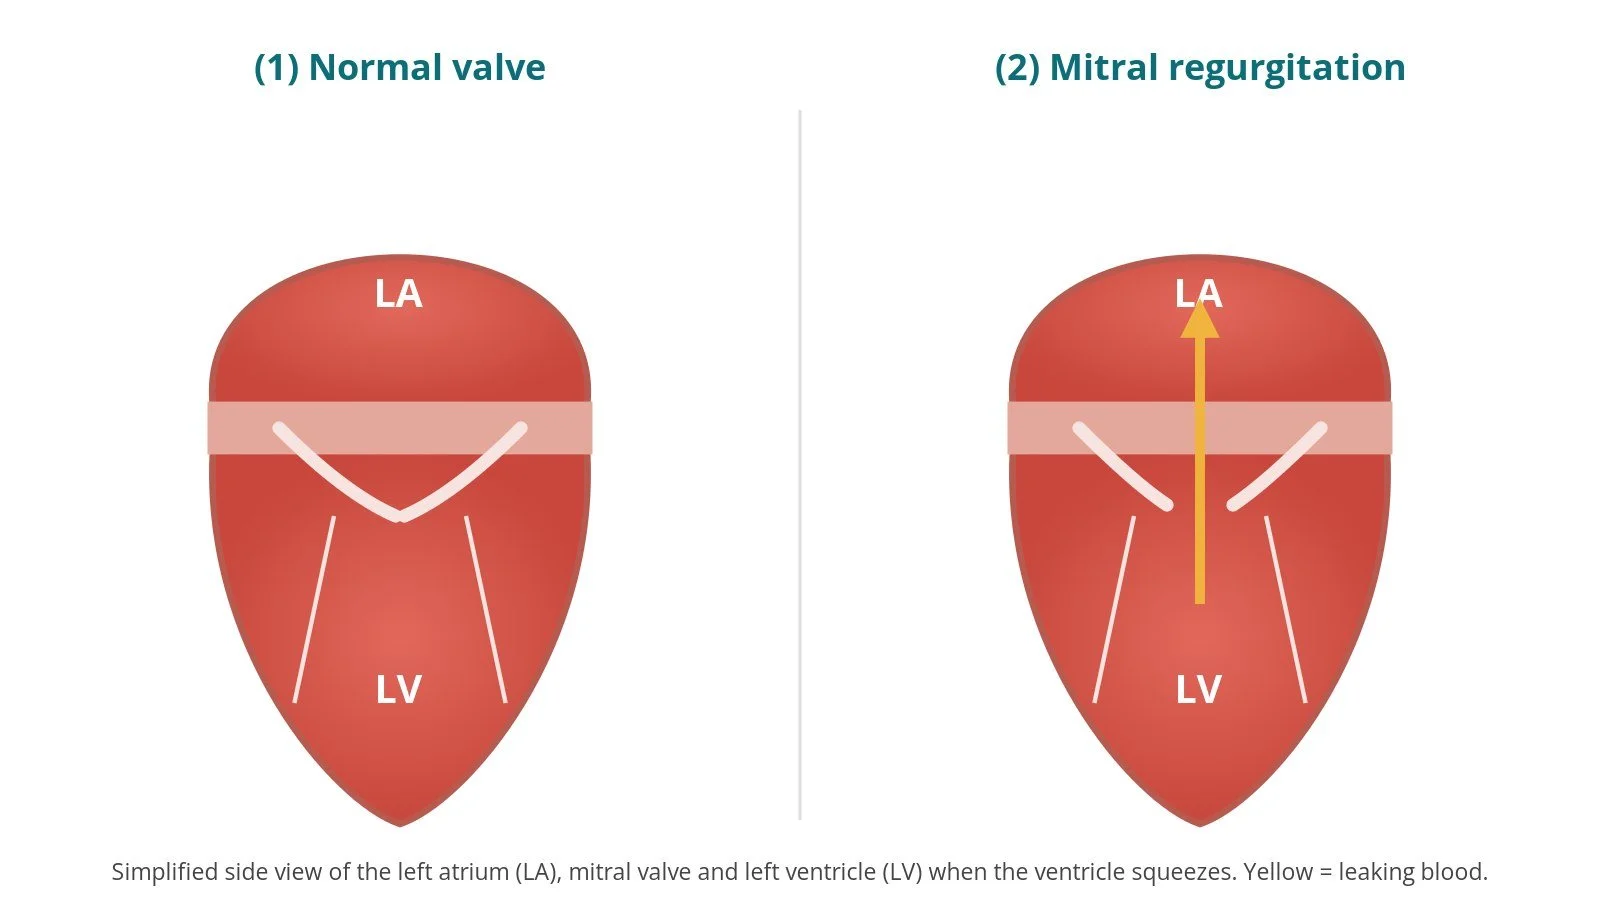
(1) Normal: the mitral leaflets meet and seal. (2) Mitral regurgitation: blood leaks back into the left atrium with each beat.
What is mitral TEER?
The mitral valve has two thin leaflets, the anterior and posterior leaflet, held by cords (chordae) attached to muscles in the left ventricle (LV). When the LV squeezes, the leaflets should meet tightly so blood goes forward into the aorta.
In mitral regurgitation (MR), the leaflets do not meet, and some blood leaks back into the left atrium (LA). Over time this can cause breathlessness, tiredness, an irregular rhythm such as atrial fibrillation (AF) and heart failure. There are two main types:
Primary (degenerative) MR: the valve itself is faulty, for example a floppy leaflet (prolapse) or a torn cord (flail leaflet).
Secondary (functional) MR: the leaflets are normal, but the LV or LA is enlarged, so the leaflets are pulled apart and cannot meet.
Transcatheter edge-to-edge repair (TEER) copies an open-heart technique in which a surgeon stitches the middle of the two leaflets together. Instead of a stitch, a small clip made of metal covered in fabric is passed up from a vein in the groin, crosses into the LA through the wall between the atria, and grasps both leaflets at the leak. The valve then opens as two smaller openings (a "double orifice") and leaks less. One or more clips can be used.
New to the acronyms? See the Cath Lab Abbreviations A–Z.
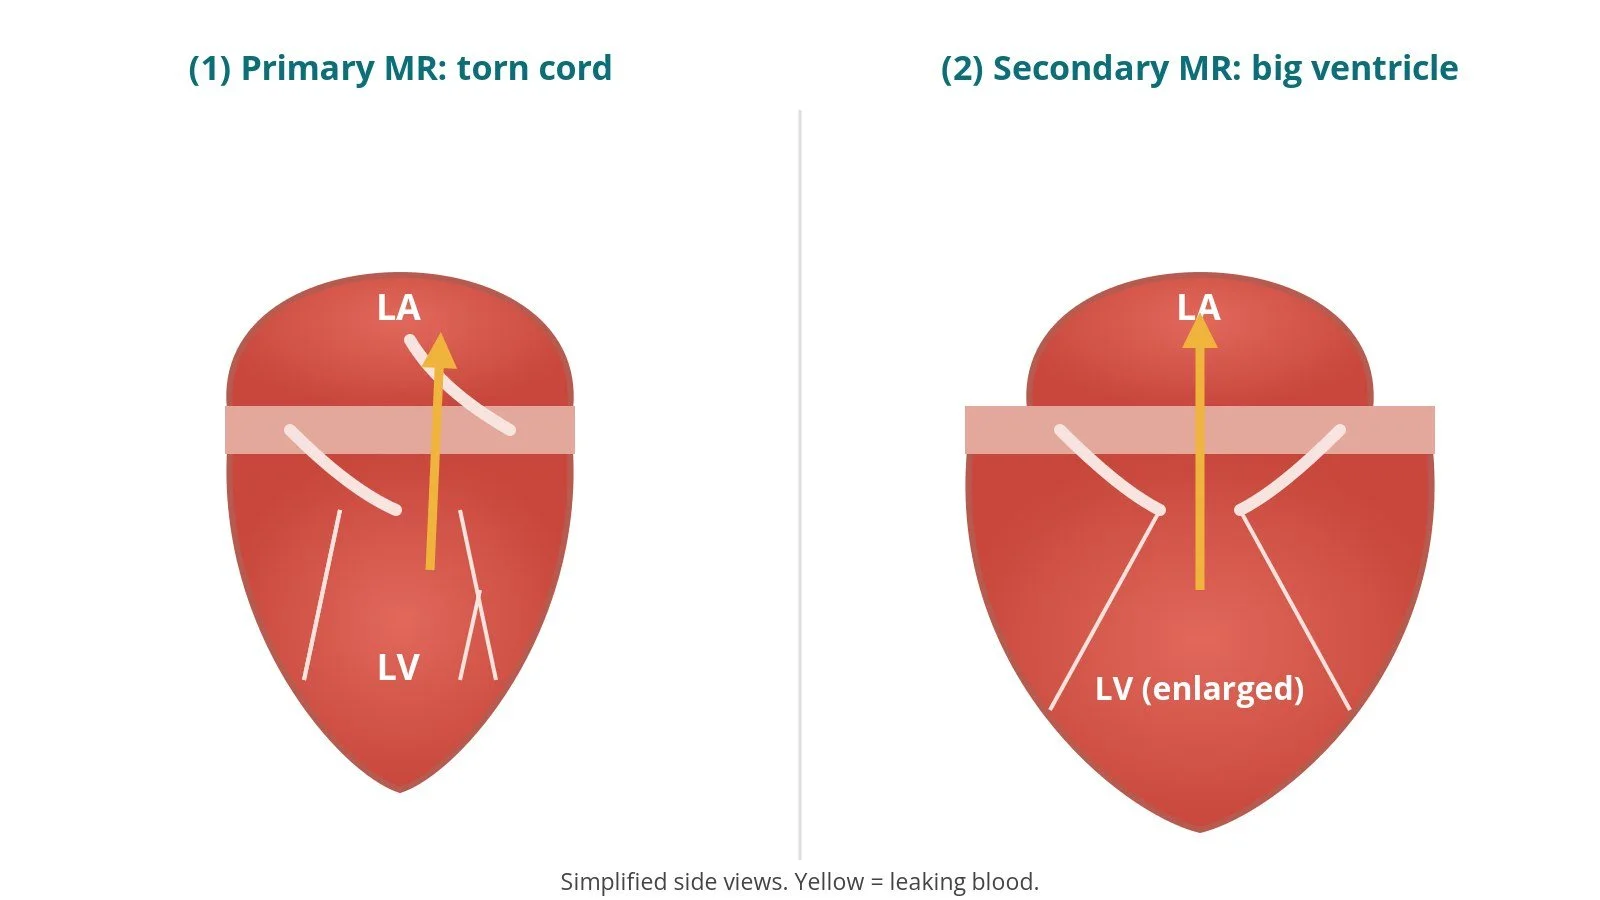
(1) Primary MR: the valve itself is faulty, here a torn cord. (2) Secondary MR: an enlarged ventricle pulls normal leaflets apart.
Who is it for?
The decision is made by a heart team, usually an interventional cardiologist, a cardiac surgeon, an imaging (echo) specialist, a heart failure specialist and an anaesthetist. NICE guidance (IPG649, now listed as HealthTech guidance HTG513) supports the procedure for people for whom open surgery is contraindicated after risk assessment, with selection by a multidisciplinary structural heart team in specialist centres with surgical back-up. The ESC/EACTS valvular heart disease guidelines describe similar use:
primary MR with symptoms, where surgery is high risk or not suitable and the valve anatomy is suitable for a clip
secondary MR with symptoms that continue despite the best heart failure medicines (and, where appropriate, CRT pacing), in selected people
Not every valve is suitable. The team looks closely at the anatomy on TOE: the leaflet length, the size of the gap, calcium, and how narrow the valve would become after clipping.
When is it done?
It is a planned procedure. Before it, the team usually arranges:
echo, including TOE to assess the valve, and sometimes a stress echo or cardiac MRI
blood tests, including a group and save, kidney function and clotting
an ECG and a review of blood thinners, which are stopped or adjusted as per centre protocol
a discussion of the aims, risks and alternatives, including surgery and medicines alone
Step by step
1. Anaesthetic and set-up
TEER is done under general anaesthetic so a TOE probe can guide every step. X-ray (fluoroscopy) is used throughout. Arterial and venous lines and a urinary catheter are usually placed. Antibiotics are given as per centre protocol. The delivery system rests on a stabiliser on a platform at the foot of the table, set up per device instructions.
2. Femoral vein access and transseptal puncture
Access is from the right femoral vein, under ultrasound. The vein is dilated step by step so a large steerable guide catheter can be passed; sizes are per device and operator. Some operators place a suture-based closure device at the start.
A transseptal needle inside a sheath is used to cross the atrial septum from the right atrium into the LA, under TOE and X-ray. The puncture site is chosen carefully (usually high and towards the back), so the clip can reach the valve at the right height.
Anticoagulation (heparin) is given once the septum is crossed, dose as per centre protocol. A stiff wire is placed in the LA and the guide catheter is passed over it, then de-aired carefully.
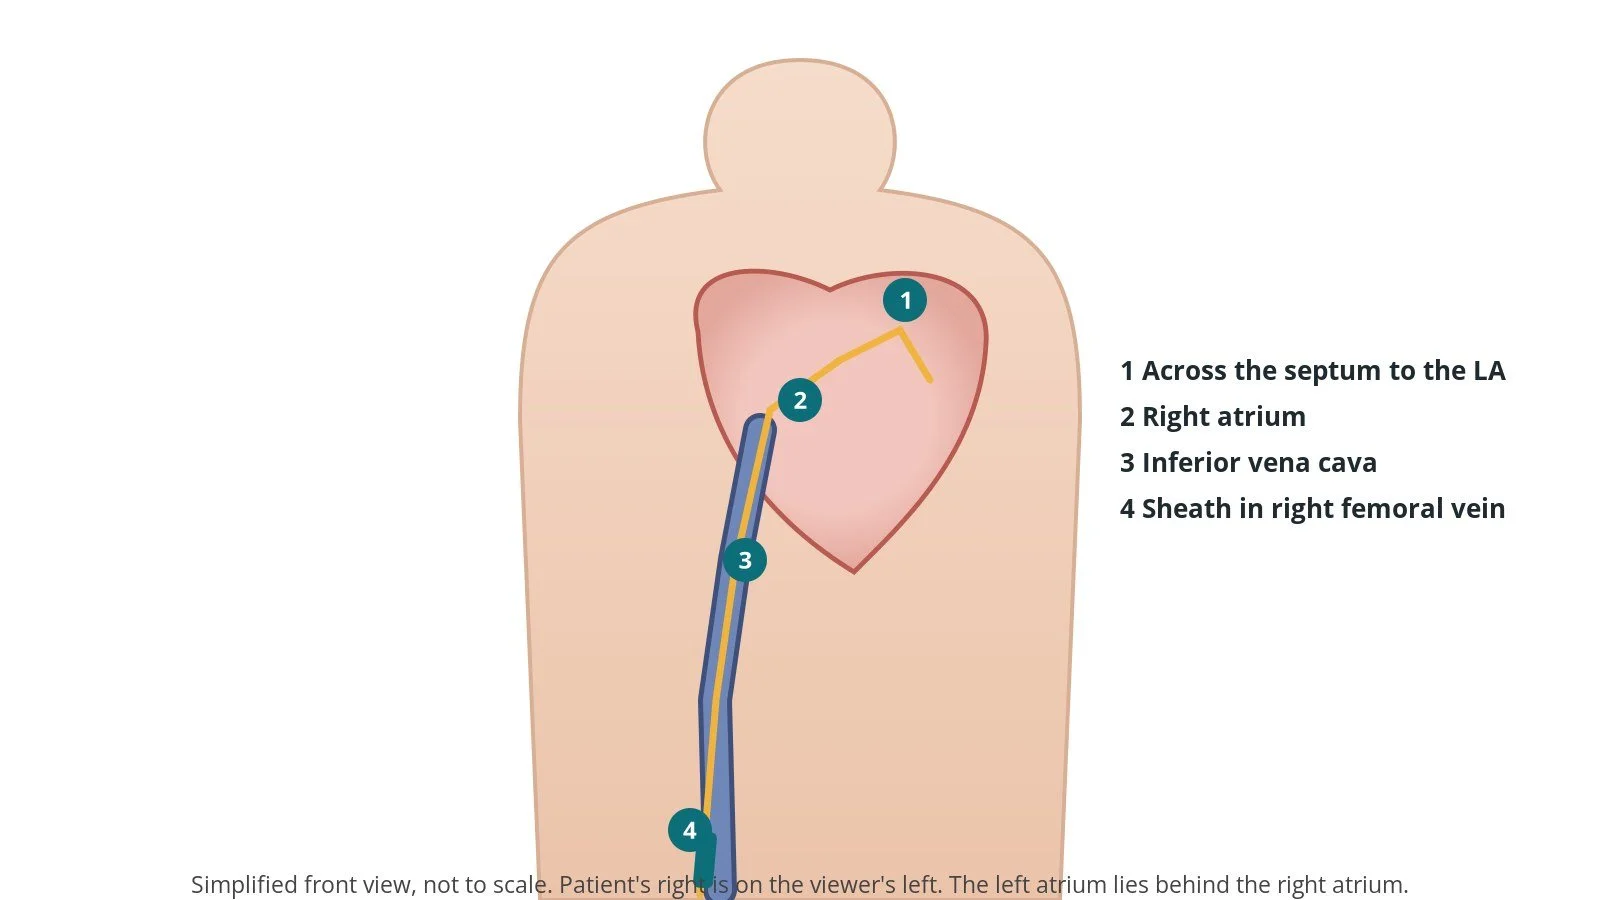
Access: (1) across the septum into the left atrium, aimed at the mitral valve; (2) right atrium; (3) inferior vena cava; (4) sheath in the right femoral vein.
3. Steering, grasping and releasing the clip
A. Into the LA. The prepared, de-aired clip delivery system is passed through the guide into the LA.
B. Above the leak. The clip is steered until it sits directly above the leak, with its arms at right angles to the line where the leaflets meet, checked in several TOE views.
C. Grasp. The open clip is advanced through the valve into the LV, then pulled back gently until both leaflets rest on its arms. The grippers are dropped to hold the leaflets, and the arms are closed.
Check. TOE confirms both leaflets are held well and measures how much leak remains and how narrow the valve has become (the pressure gradient). If the result is not good enough, the clip can be opened, the leaflets released and the clip repositioned.
D. Release. When the team is satisfied, the clip is released from the delivery system. A second or further clip may be added if a meaningful leak remains.
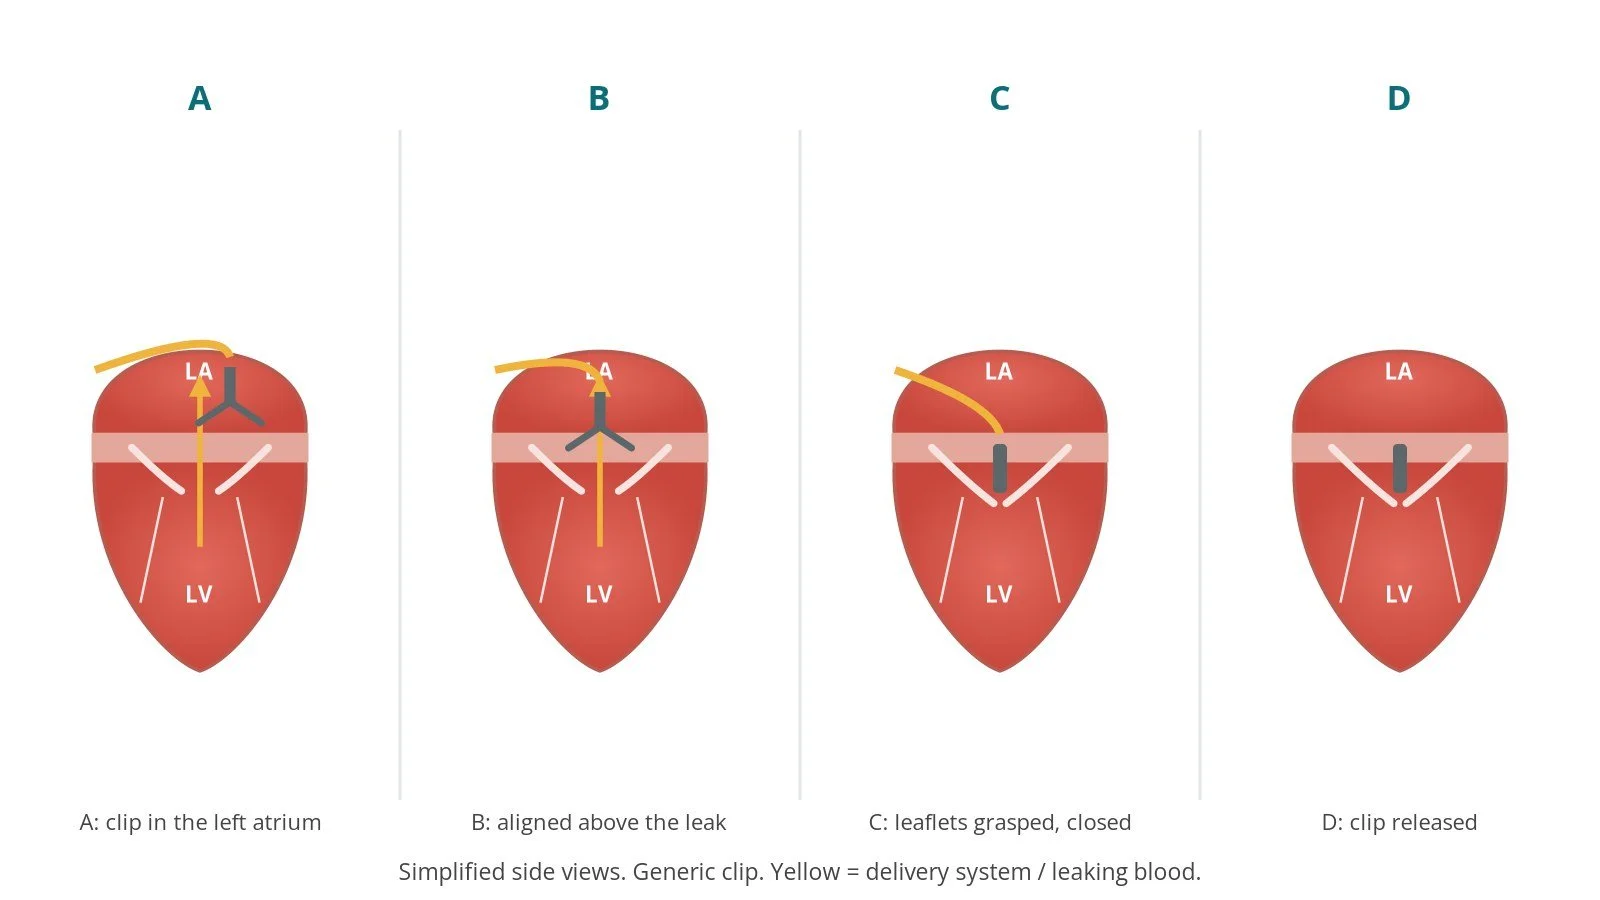
A: clip in the left atrium. B: aligned above the leak. C: leaflets grasped and arms closed. D: clip released.
4. Finishing
The delivery system and guide are removed. The vein is closed with a suture-based closure device, a figure-of-eight stitch or pressure, per operator. TOE checks the small hole left in the atrial septum and for fluid around the heart.
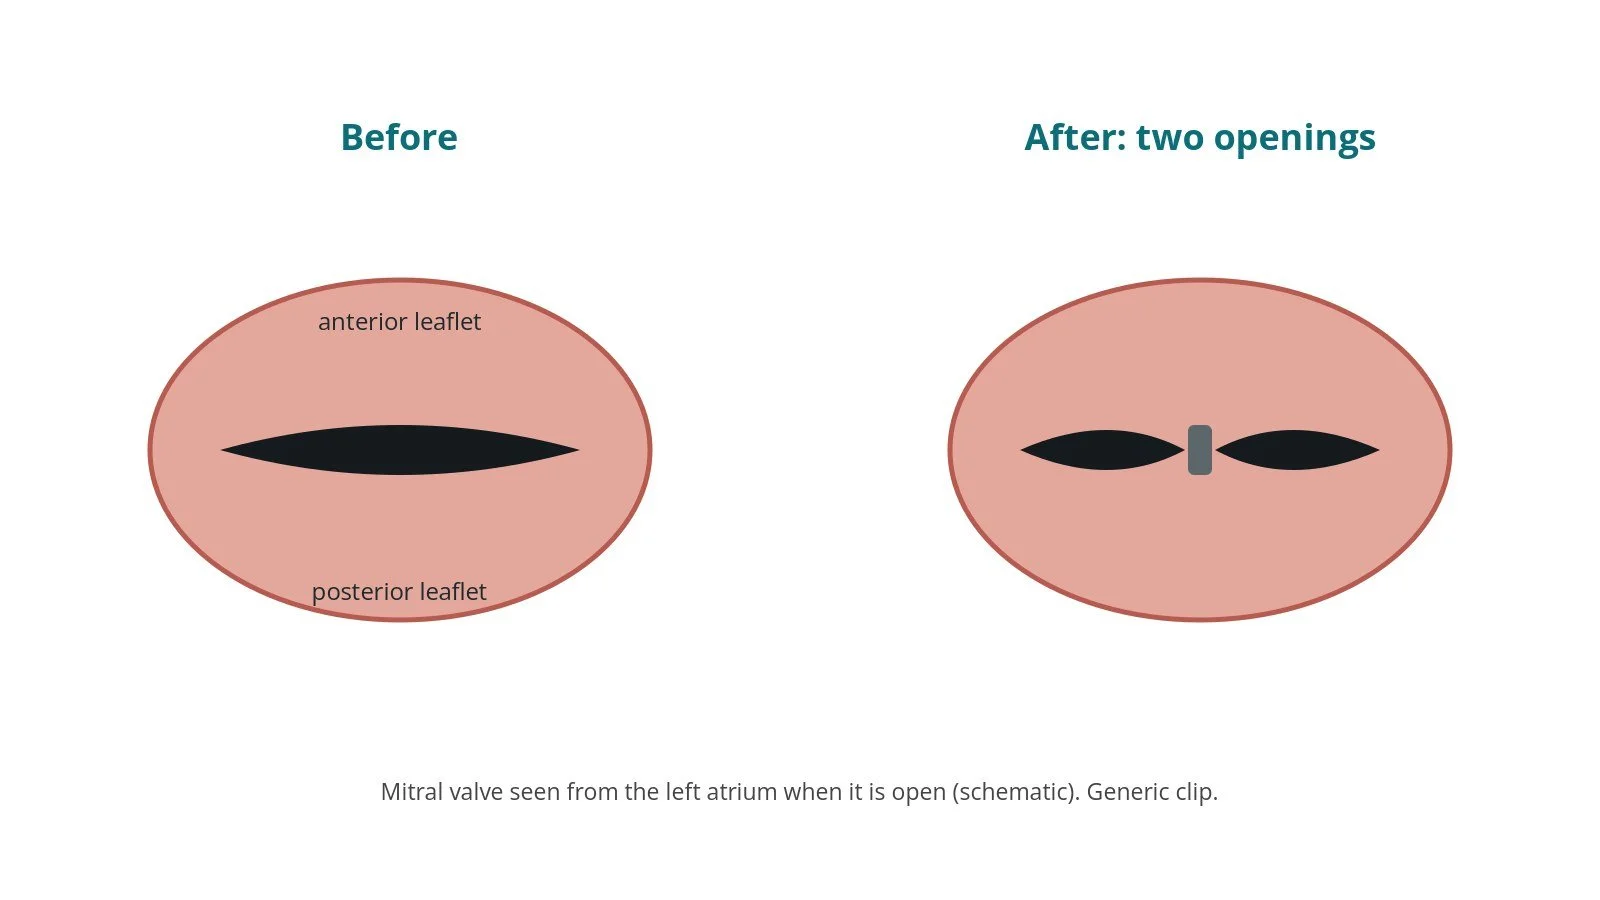
The valve seen from the left atrium. Before: a gap at the leak. After: the clip joins the leaflets, leaving two openings (double orifice).
Recovery and aftercare
First hours: you wake up in recovery. Bed rest for a few hours with checks of the groin, blood pressure and heart rhythm, as per centre protocol.
Going home: often after 1 to 2 nights, after an echo.
Medicines: antiplatelet or anticoagulant medicines as advised by your team. Heart failure medicines usually continue.
Activity: avoid heavy lifting for about a week, or as advised.
Follow-up: with the heart team, usually with an echo after a few weeks.
Dental and medical procedures: tell your dentist and doctors you have a heart valve device; they will follow current guidance on infection prevention.
Driving: follow the DVLA guidance for your heart condition and ask your team. Do not drive for at least a few days after a general anaesthetic.
Call 999 if you have chest pain, sudden breathlessness, fainting, or heavy bleeding from the groin that does not stop with firm pressure.
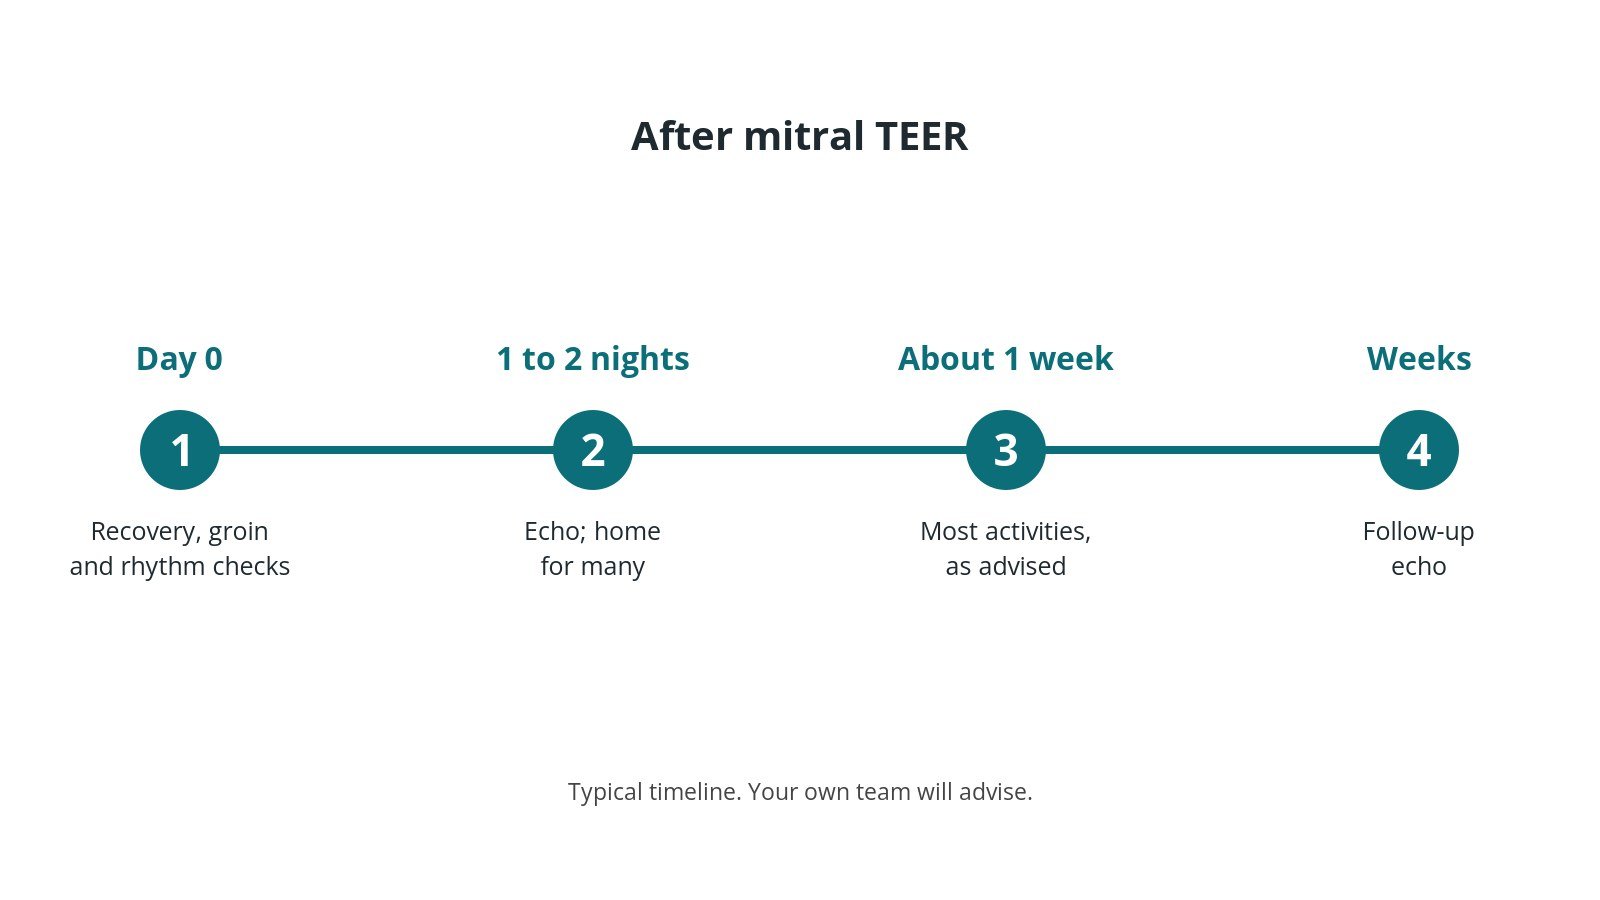
After mitral TEER: (1) recovery and checks; (2) echo, home after 1 to 2 nights for many; (3) most activities after about a week; (4) follow-up echo.
Risks and complications
Your team will discuss your own risks. Possible problems include:
bleeding, bruising or a vein injury at the groin
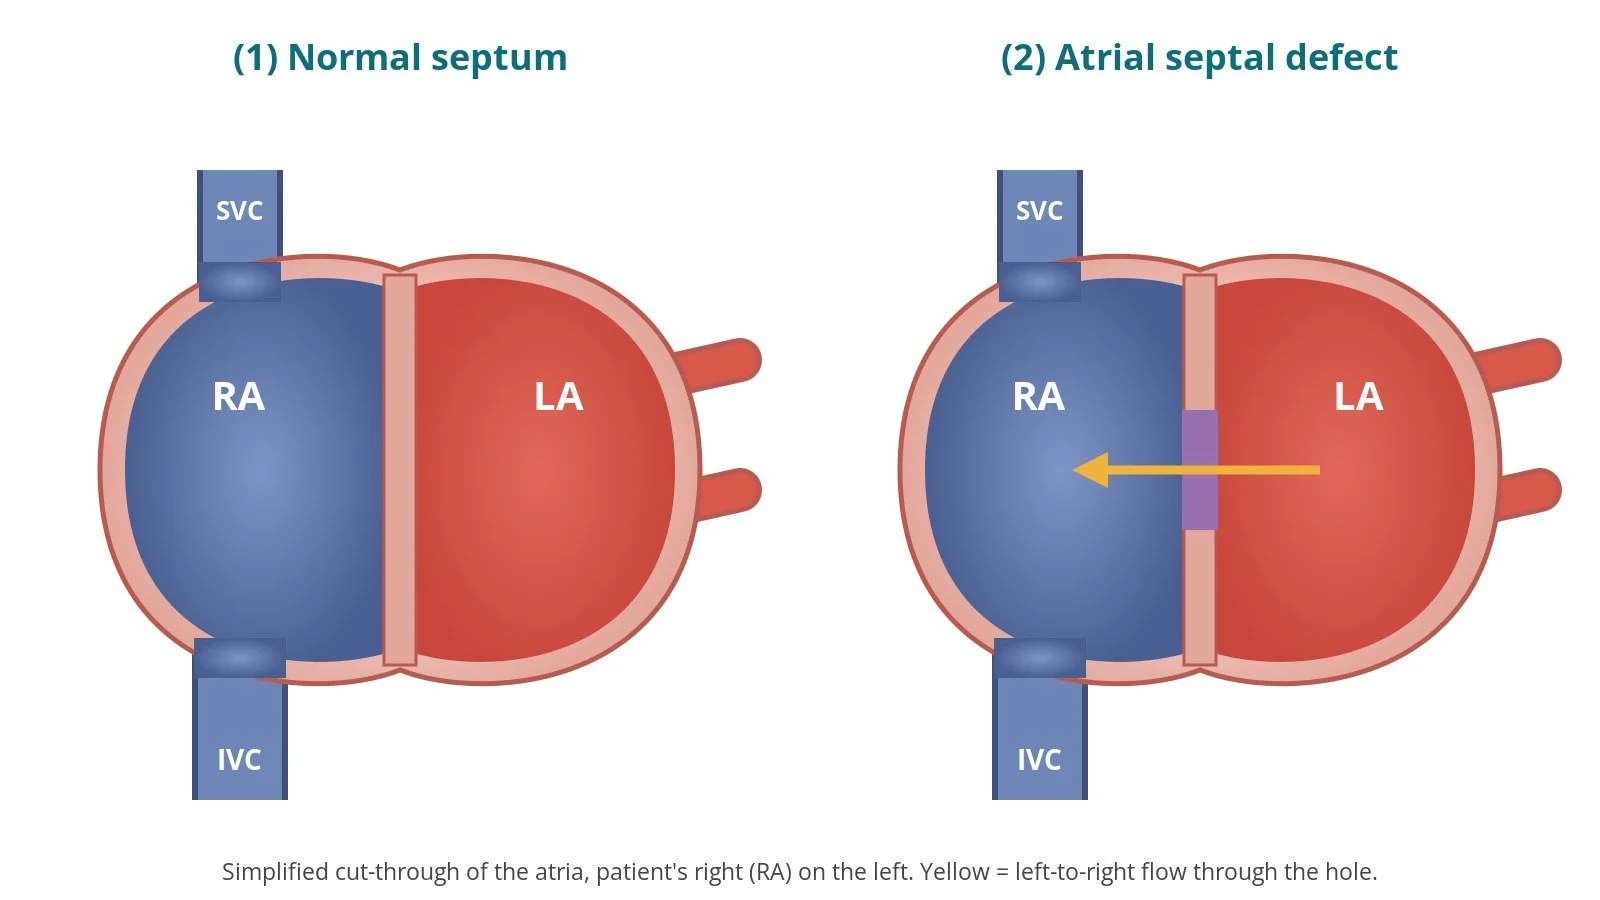
a small hole remaining in the atrial septum, which usually needs no treatment
fluid around the heart (pericardial effusion) from a perforation of the atrium or its appendage
the clip detaching from one leaflet (single leaflet device attachment), or damage to a leaflet or cord
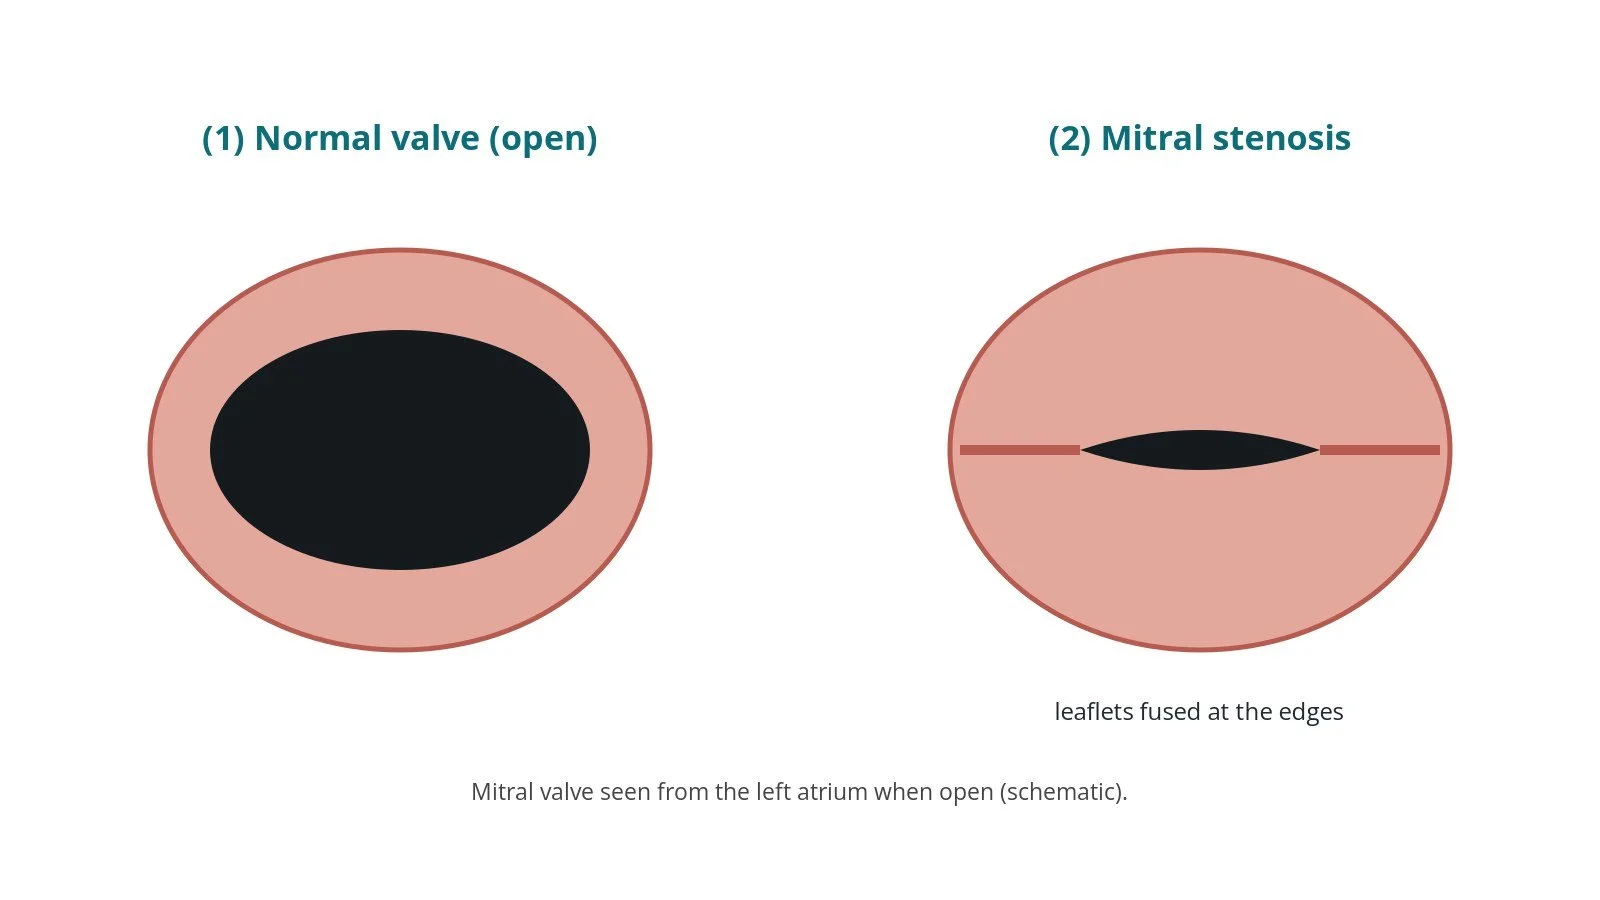
the valve becoming too narrow (mitral stenosis)
irregular heart rhythms
stroke, infection or, rarely, the need for surgery
Cath lab kit list (printable)
Barts example kit list
An example from one UK centre, written generically. Every lab has its own protocol, and sizes and doses vary.
Delivery set-up
steerable guide catheter and clip delivery system (per device and operator)
stabiliser, support plate and lift platform at the foot of the table, positioned per device instructions
heparinised saline flush bags, pressure bags, giving sets and 3-way taps, as per centre protocol; extra sets for each additional clip
needle-free Luer access devices; large Luer-lock syringes
absorbent pads for the floor (saline flush overflow)
Access
procedure pack, femoral access needle, ultrasound probe cover, skin antiseptic
femoral venous sheaths and dilators, sizes per device and operator
suture-based vascular closure devices, per operator
diagnostic catheter for pressures, per operator
stiff exchange guidewire, per operator
local anaesthetic and heparin, as per centre protocol
Transseptal
transseptal needle and transseptal sheath, per operator
Imaging
TOE probe and echo machine; X-ray
Procedural steps (Barts example)
General anaesthetic; arterial line, venous line, urinary catheter; TOE probe placed
Right femoral venous access under ultrasound; closure sutures pre-placed if used
Sequential dilation of the vein, size per device and operator
Transseptal puncture under TOE and X-ray; stiff wire parked in the LA
Heparin as per centre protocol
Stabiliser positioned; guide catheter and dilator prepared and flushed; guide passed into the LA and dilator removed
Clip delivery system prepared, de-aired and advanced into the LA
Clip positioned above the leak, perpendicular to the leaflet line; advanced into the LV
Pulled back to grasp the leaflets; grippers dropped; arms closed
Leaflet grasp, remaining leak and gradient checked on TOE; reposition if needed
Clip released; further clips if needed (prepare extra flush sets)
Delivery system and guide removed; vein closed per operator
First time in the cath lab?
💡 First-time tip
Respect the air. The guide sits in the left atrium. Flush lines must stay bubble-free, and the flush bags must not run dry. Know where the stabiliser goes. Set up the support plate and platform before the patient arrives so the delivery system lines up with the groin. Prepare for a second clip. Know where the extra flush sets and a second delivery system are kept. Watch the pressure and the echo. A falling blood pressure can mean fluid around the heart; tell the team straight away. Learn the TOE views. The echo operator guides every move; knowing the views helps you follow the case.
FAQ
Is this open-heart surgery?
No. Everything is done through a vein in the groin, so there is no cut in the chest.
Will my valve be normal afterwards?
The aim is to reduce the leak, not remove it completely. Many people have a small remaining leak.
Can I feel the clip?
No.
Can I have an MRI scan afterwards?
Valve clips are generally labelled MR conditional, which means a scan is possible under set conditions. Always tell the scanning team and carry your implant card.
Can it be done on the tricuspid valve too?
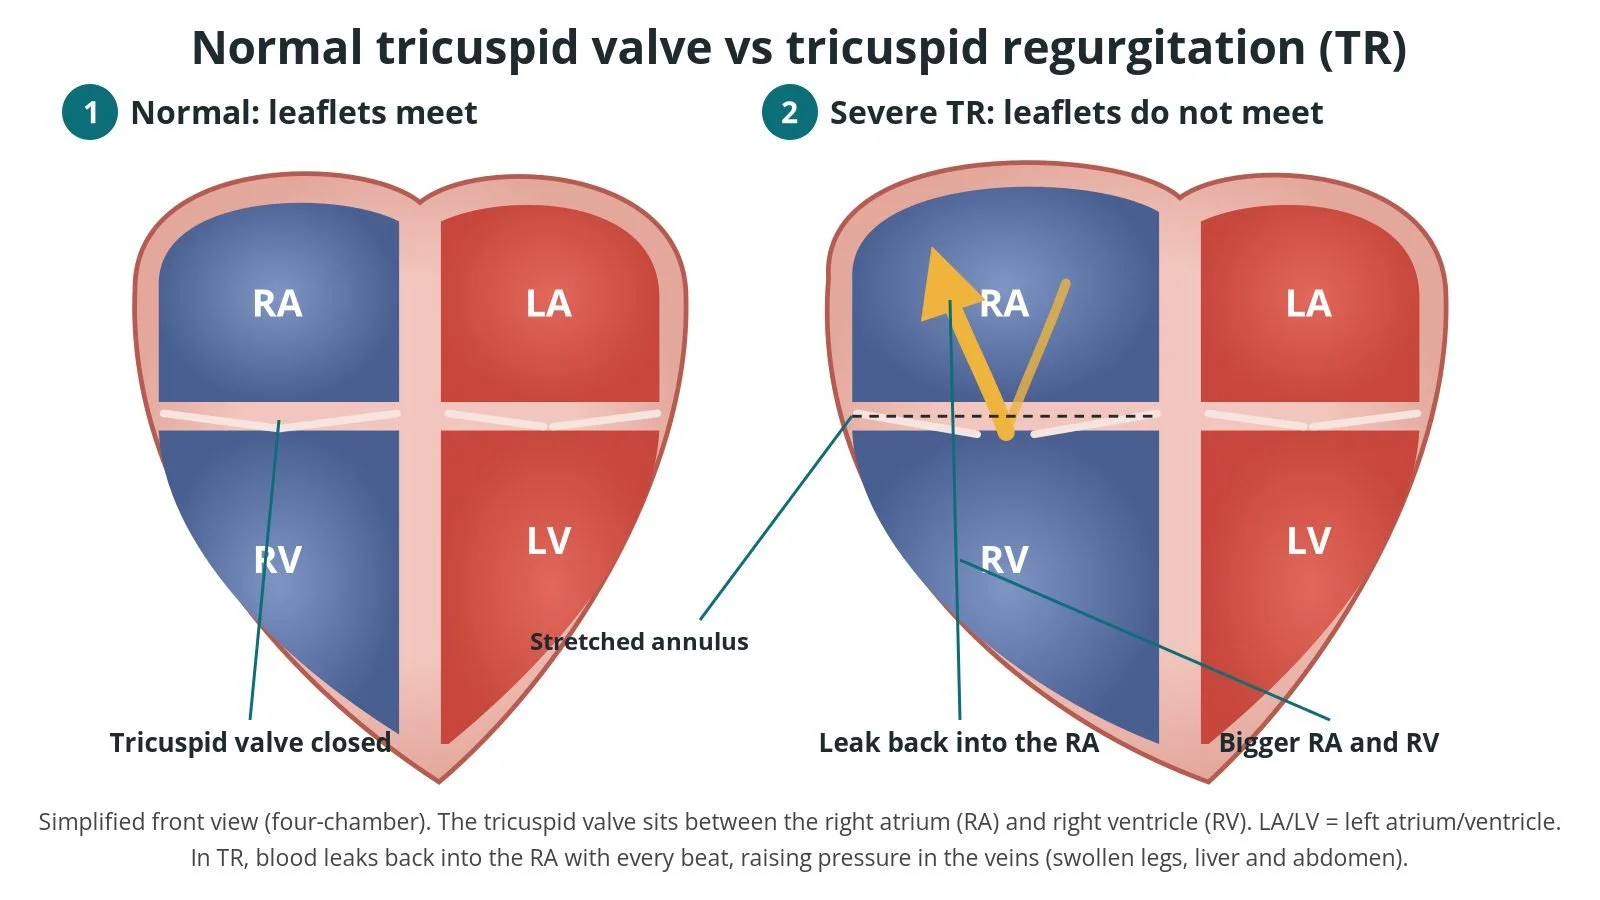
Yes, a similar technique is used for the tricuspid valve. See the Tricuspid TEER guide.
Related Cath Lab 101 guides
Sources
All checked on 10 October 2026. Each page's own date is shown where it gives one.
NICE. Percutaneous mitral valve leaflet repair for mitral regurgitation (IPG649, now HTG513). nice.org.uk/guidance/htg513 (published 29 May 2019)
NICE. Heart valve disease presenting in adults: investigation and management (NG208). nice.org.uk/guidance/ng208
Vahanian A, et al. 2021 ESC/EACTS Guidelines for the management of valvular heart disease. Eur Heart J 2022;43(7):561–632. PubMed 34453165
NHS. Heart valve disease. nhs.uk/conditions/heart-valve-disease
British Heart Foundation. Heart valve disease. bhf.org.uk
DVLA / GOV.UK. Cardiovascular disorders: assessing fitness to drive. gov.uk
Disclaimer
Education only. This page is for general education for healthcare students, cath lab staff and curious readers. It isn't medical advice and doesn't replace advice from your own doctor, heart team or local unit protocols. Equipment and medicines are described generically. No product or manufacturer is recommended. If you think someone is having a heart emergency, call 999.
Disclosure: I work for a company that makes a device used in this procedure. This page is independent education, isn't sponsored or reviewed by any company, and doesn't recommend any product.
All diagrams on this page are original illustrations created for rodnieoro.com.